In an effort to be more social on the web, a little over a month ago I signed up for a postcard swap with 20 Something Bloggers. I greedily signed up for the max of four swaps, because why not and also because I really like getting regular mail (doesn’t everyone?). After debating for a few weeks over the perfect postcard to send each person, I finally just did a bunch of cards up in watercolor, along with a few extras to send to family. Usually when I paint it tends to be lots of portraits and still-life, so it was fun to change it up a little.
Scroll down to see the rest, and also for links to the bloggers I swapped with.
I thought these fruit postcard stamps were too perfect, but I’m also a sucker for stamps in general.
I’ve recently been working on my online web presence, and decided I needed a vanity url. My design work is located at rileymoorestudio.com, but I wanted something more generic to my personal brand, so I’ve just recently done up rileyemoore.com. The idea is to have a place where you can follow most of my online life, and I hope it will inspire me to keep up with all my social media accounts.
I’m coming up on two years with my Warby Parkers, and I realized I never shared which style I chose. Since I get a lot of visits to my at home try on posts (here and here), I thought I should share. I ordered the Webb in Amber, and I’m very, very happy with them. I don’t believe they will ever go out of style – something about tortoiseshell is timeless!
This was on the drive up to Montreal, I remember it was amazingly cold but I very fashionably opted for a light-weight cougar sweatshirt. I have no explanation for why I’m making a face like I had a fat lip.
How amazing is this old victorian home overlooking the town? It feels like a movie set and I love that there is an American flag on the pole out front.
Have you ever dreamed of living abroad? I have and do on a regular basis, although they’re not dreams of a small apartment in a destination city. My dreams involve countryside living in obscenely large estates. Today’s are all in Italy and my are they grand.
1. Il Castello sul lago
Dating back to the year 802 (well before the discovery of the Americas), this compound includes a church, main living quarters and a guest house. It was at one point a military fortress!
(more info and photos here)
2. Villa delle Anfore
This home is on the Tuscan coast with private access to the sea. There are stone steps leading down to the water and the home is gorgeous, but my favorite part is this perfect vined terrace for dining outdoors.
(more info and photos here)
3. Villa Strozzi
This insanely regal property sits amongst it’s own park of woods, wine vineyards and olive groves. It also includes a chapel, farmhouse, swimming pool and tennis court.
(more info and photos here)
4. Relais la Grande Quercia
Currently in use as a hotel, this property is a modern meets rustic paradise. It sits between the Sibillini Mountain National Park and the Adriatic Coast, overlooking the countryside.
(more info and photos here)
5. Po Sante Hamlet
If you’ve ever wanted to own an entire village, or maybe need a place for your family compound, this hamlet located in ancient Umbria would fit the bill perfectly. The walled village has 19 individual dwellings, a central square, shared park, and pool.
(more info and photos here)
6. Villa with Garden
While this home is more modern and located in the center of Milan, it still has an air of country to it. The bright veranda has amazing windows which allow an amazing openness with nature.
(more info and photos here)
7. Villa Rinascimentale a Roma
This property is relatively new at only 92 years old (by Europe standards!), and located in the heart of Rome, only 5 minutes away from Vatican City. It is meant to be a hotel or tourism office, but I can’t see why one couldn’t make it a home.
(more info and photos here)
8. Villa delle Baccanti
This villa, located between Pisa and Florence, is a beautiful stately home with gardens of century old cypress’ and frescoes from noted 18th century artist, Ademollo. The 360 views from the rooftop loggia are stunning.
(more info and photos here)
9. Intero Borgo Medievale
To own Borgo del Ghirlandaio would feel like being a king, I imagine. The ancient mediaeval castle is home to 59 independent apartments, a church, a restaurant and a series of small shops. It reminds me of the Hornburg at Helm’s Deep in Lord of the Rings.
(more info and photos here)
10. Villa dei Satiri
This last villa is considered one of the best examples of historic Tuscan architecture. It’s insanely huge, with Italian style gardens and many buildings on premises, including a glass butterfly house and The Bagnetti, a bath house with upper podiums for musicians to play for the guests.
(more info and photos here)
What do you think? Would you live in one of these estates?
I’ve been working on treating my dust allergies for the past few years, and I’ve built up a pretty extensive list of must-have solutions that I’d like to share with anyone else who may be suffering. What follows below are home remedies and different products that allow me to live an almost allergy-free life. I’m not into invasive solutions – visits to the doctors office for allergy shots, and surgery on my septum are not for me (though both were presented as options, and they may be best for you. Talk to your doctor!) So, here’s what I use:
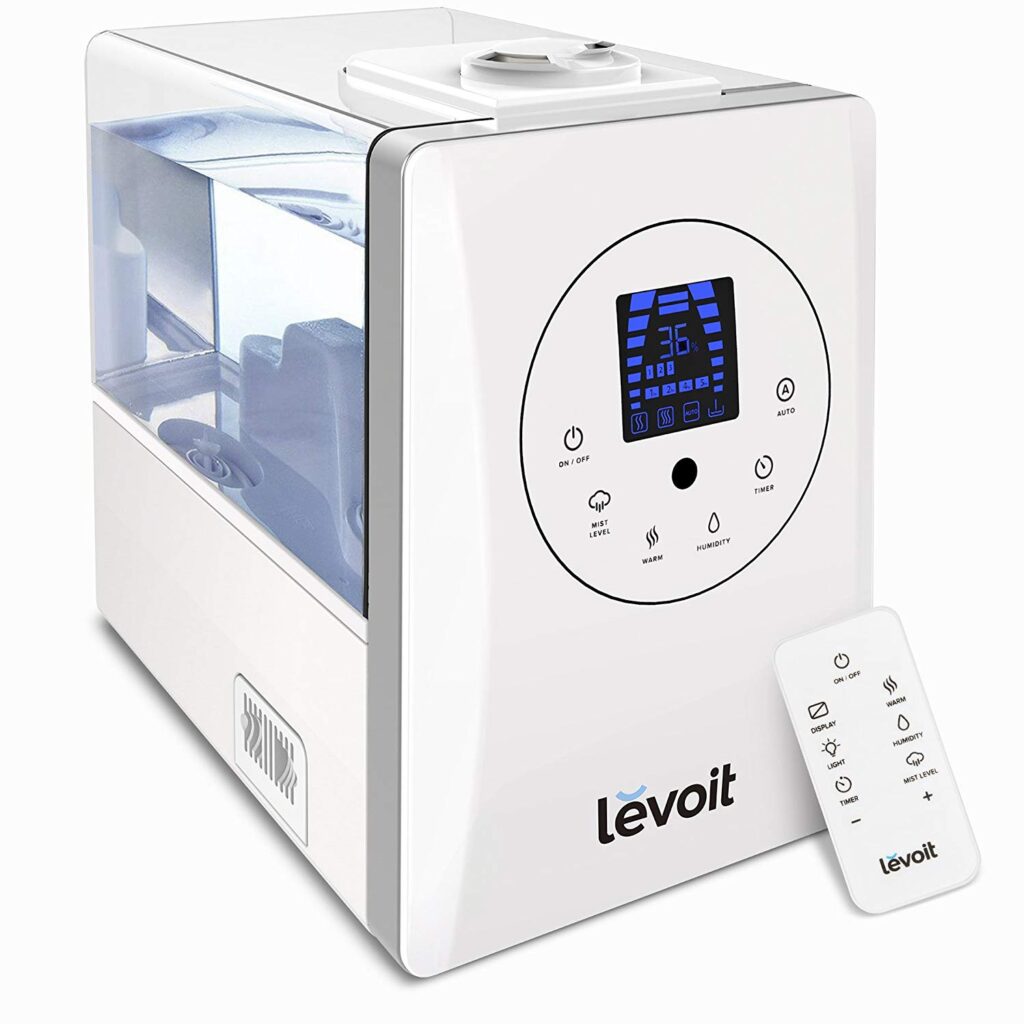
1. Humidifier
It works like this: the humid air weighs down the dust particles so they’re not floating around and finding their way into your sinuses. Humid air = your new best friend. When I run this in my bedroom at night, I don’t wake up to sneeze or frantically grab for a tissue to blow my nose. In the morning I feel totally refreshed.
I had always wanted a Roomba, but never justified the price until my allergies were getting out of control. With two cats and two people, it’s necessary to vacuum on a daily basis, and I just don’t always have the time. Once I got the Roomba, I immediately noticed a difference in my sneezing. It runs every morning, Monday through Friday, and amazingly when I go to empty the canister every afternoon there is ALWAYS plenty of dirt and cat hair (which is a dust trap!). The model I have is specifically for pets and allergies, and I will not live without it.
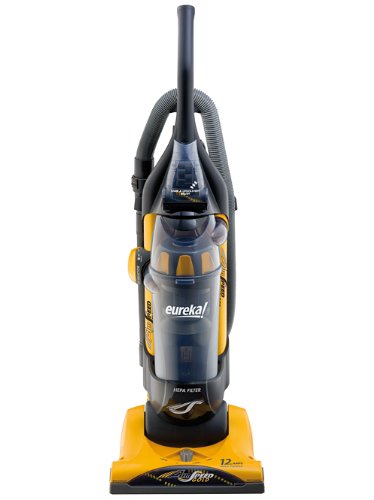
Even with the Roomba, it’s still necessary to run a regular vacuum about once a week to get corners and behind doors. I have the Eureka AirSpeed which claims to work better than a Dyson for less than half the cost. I can’t really speak to those claims because I don’t use it like a regular vacuum (or as frequently), but it does work great for what I need. Just taking those 10 minutes a week really helps get any last bits of cat fur/dust balls that are floating around.
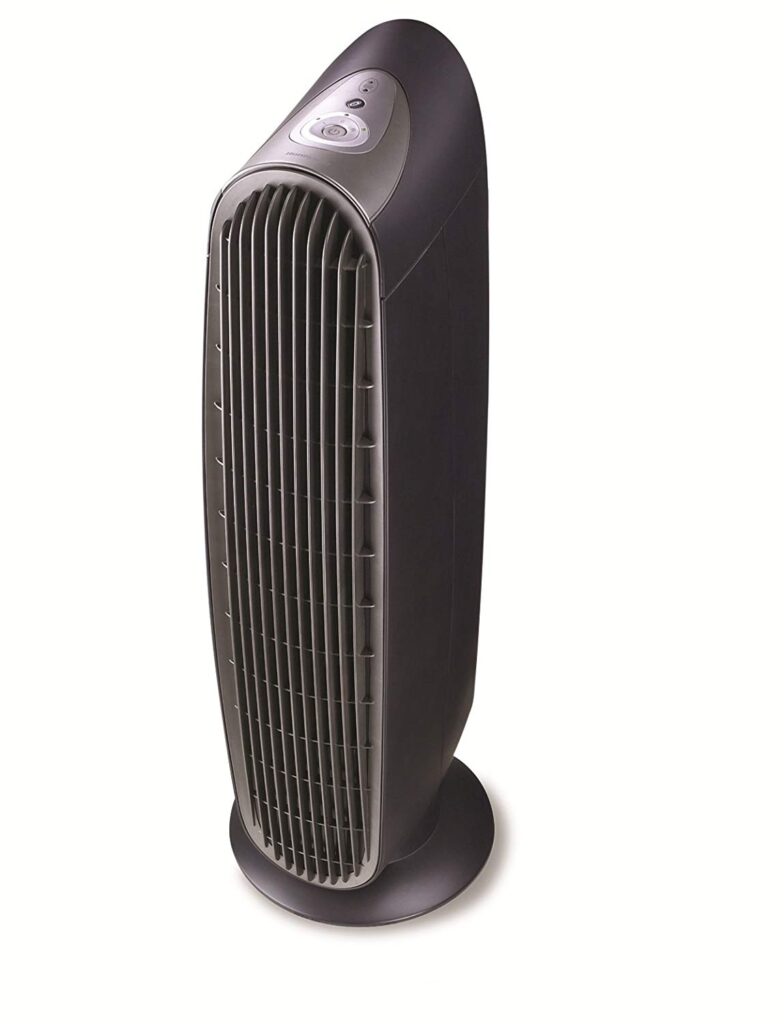
I bought an air purifier at the same time as the Roomba, and using the two of them together totally changed my life. Many of the other solutions listed here are good for dealing with the reaction to allergies, but an air purifier and vacuum help get rid of the allergens before they can reach your nasal passage. I have one purifier in my bedroom running 24/7, and another near my desk at work. Since those are the two places I spend most of my time, it’s pretty necessary to keep the air clean. This one has a permanent filter, so I just vacuum it out about once a month, which I prefer.
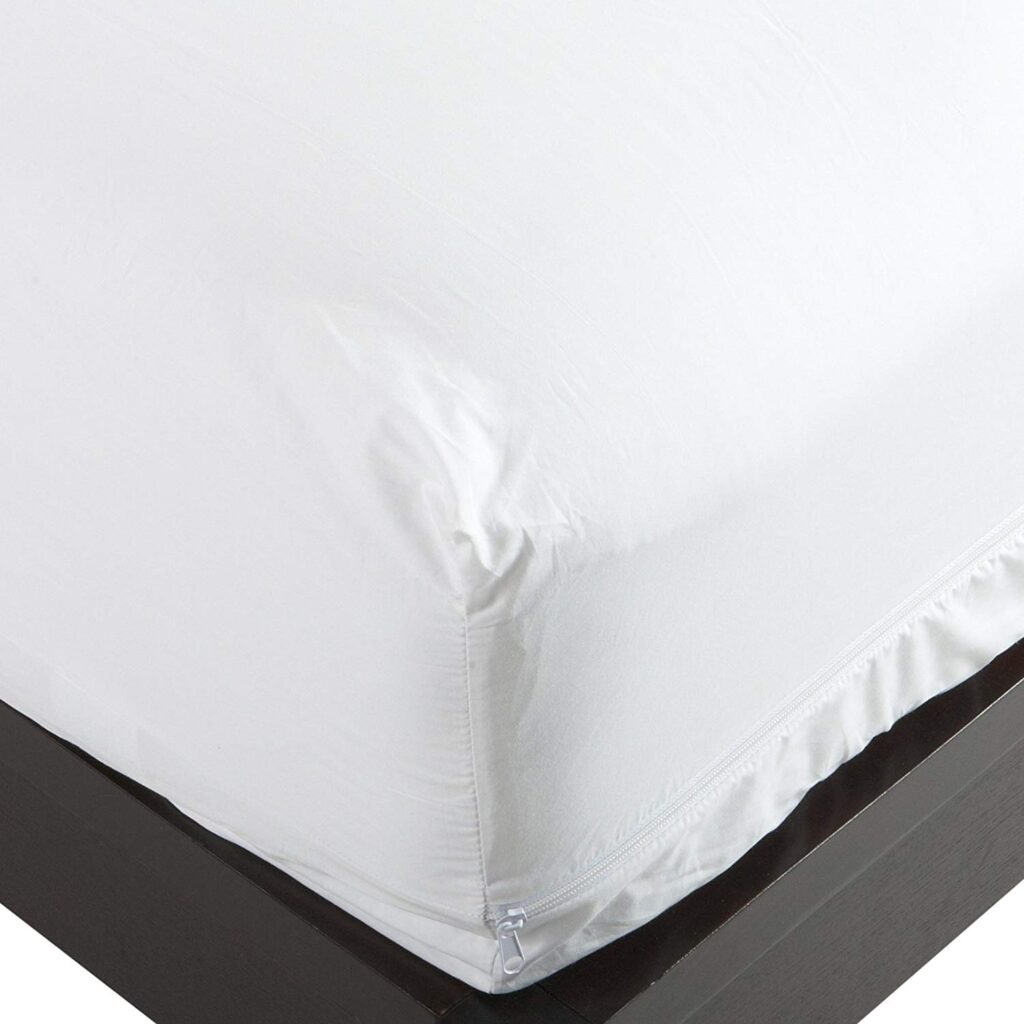
Something that my doctor stressed were mattress and pillow covers. He told me that most of the exposure to dust mites can happen while you’re sleeping, so it’s important to use specially made covers to reduce contact. I also find that washing my sheets and changing pillow covers (the regular covers that go over the allergy covers) often makes an impact.
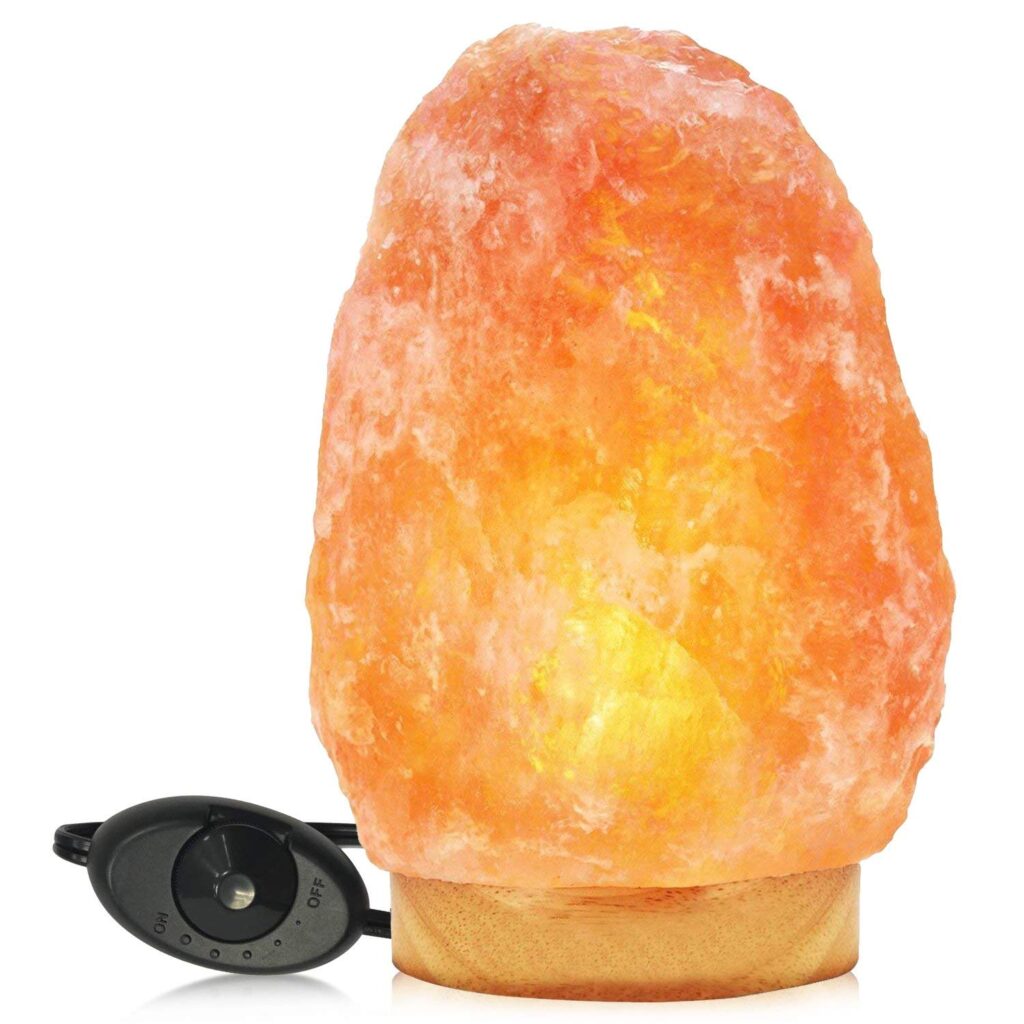
I can’t say the salt lamp has had a huge impact on my symptoms, but every little something that helps clean the air I breathe is worth trying. Himalayan salt lamps work by emitting negative ions, which purifies the air. I have this one on my bedside table, and it looks absolutely gorgeous when lit up at night. It’s surprisingly bright and has a really peaceful glow to it which is perfect for transitioning to the night hours.
A more traditional route to reducing symptoms, and one used by those with seasonal allergies (the lucky ones! mine are year-round) is taking an antihistamine. The brand isn’t important, I just look for one with Chlorpheniramine Maleate. I don’t use these regularly, but they are good to have around in case of a particularly bad reactions.
While not directly related to allergies, I decided to start taking probiotics to help with overall health. Probiotics help to keep your digestive system in balance (particularly after a round of antibiotics), and my rational is that the healthier my body is as a whole, the more it can heal itself where I need it (overreacting sinuses!).
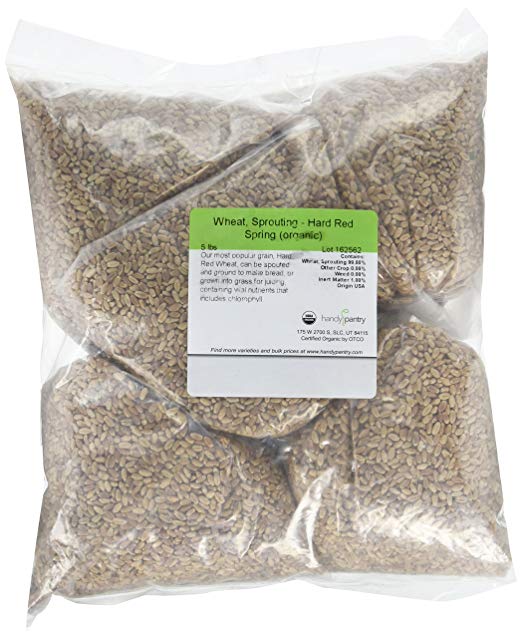
Wheatgrass juice goes along with improving my entire wellbeing. It takes some effort growing and juicing the grass, but every time I drink it I feel SO ALIVE. I recommend it for anyone, not only allergy sufferers.
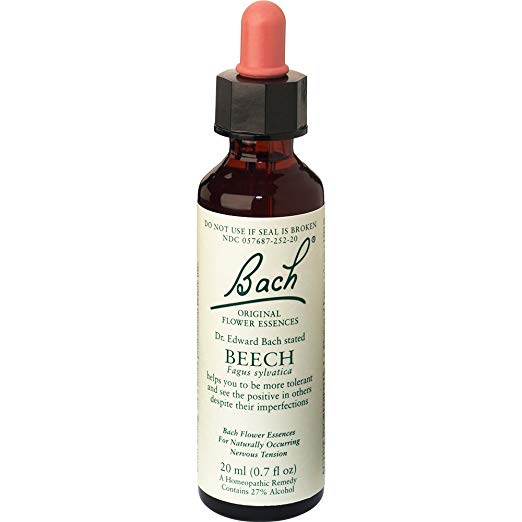
Bach flower remedies are a variety of tinctures using a flower/plant material, water, and brandy. The most common is probably the Rescue Remedy, which many people use when they are stressed to help calm down. The Beech Bach Remedy is described to be used for tolerance (towards people, situations – or allergies!). I add 6-8 drops to a glass of water, and drink several of these glasses a day. Anything to help build my tolerance, particularly anything that’s natural!
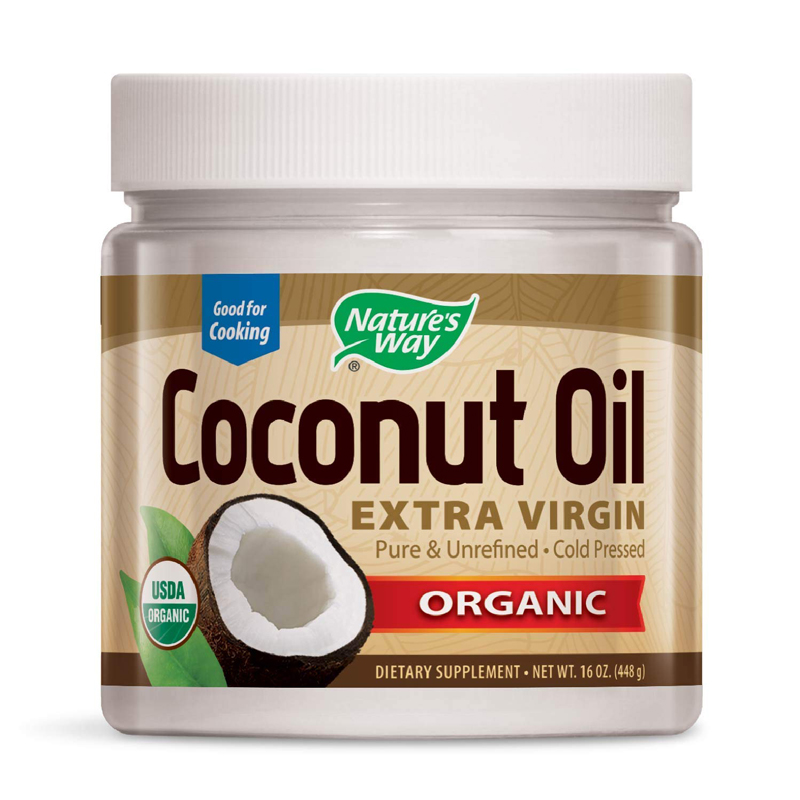
Another alternative remedy I tried was oil pulling, which is an ayervedic folk remedy which involves swishing oil (coconut, oil, sesame, etc) around your mouth for 20 minutes a day, first thing in the morning. It’s supposed to draw toxins out through the tongue, which is connected to all systems in the body. Oil pulling is used for a variety of ailments, and while it sounds like another strange fad, I had a good experience with it. My allergies are always at their worse in the morning, and have cleared by mid-afternoon, but something about the oil pulling seems to expedite the process. On the mornings when I can find an extra 20 minutes, I do this using coconut oil, and by the end it seems pull everything to the front of my sinuses.
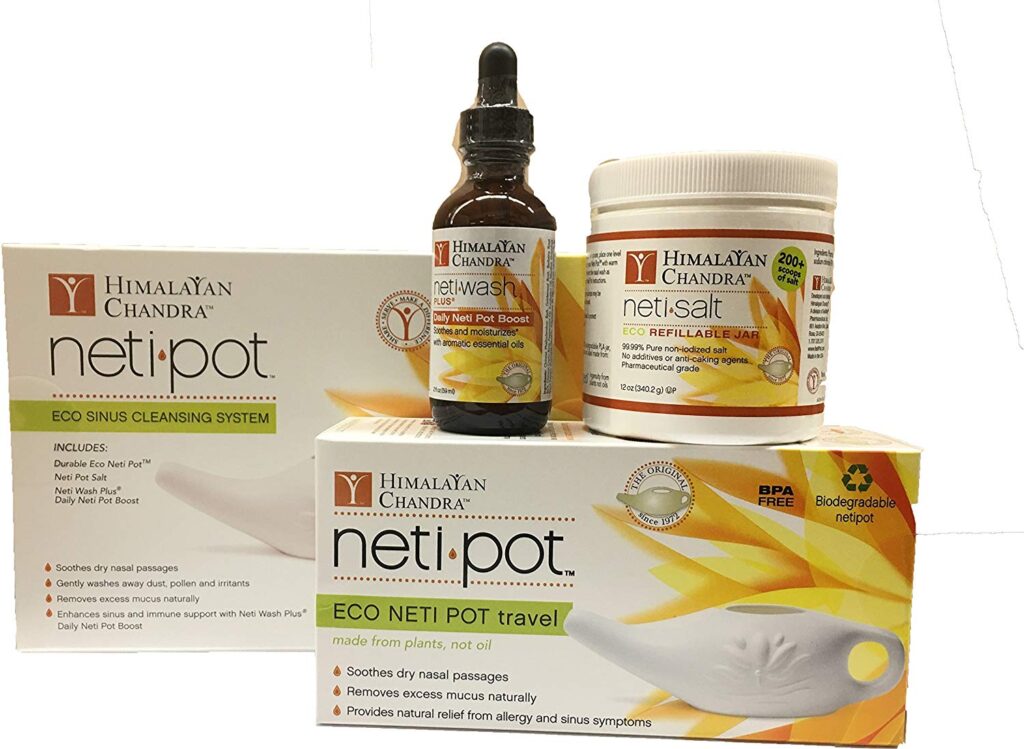
Like the oil pulling, using a neti pot first thing in the morning can provide immediate relief by clearing out the irritants before they get a chance to attack. I don’t do this everyday, but definitely have a neti pot and the salt solution on hand for the really bad days.
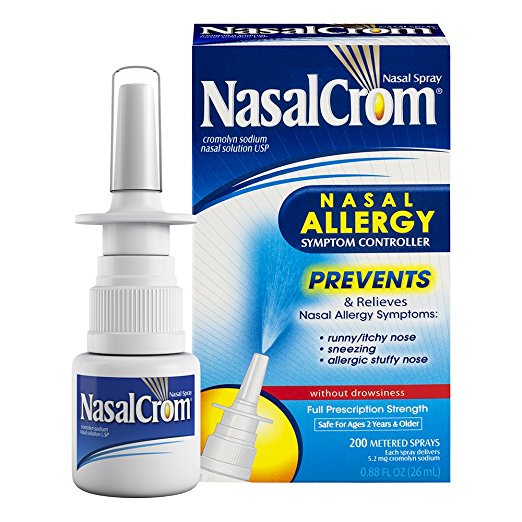
A nasal spray isn’t something I would rely on to cure your allergies, but it’s great to have on hand for attacks throughout the day. I have one in my bathroom, handbag, and desk drawer. Alternatively a salt spray will also help to clear your nasal passages.
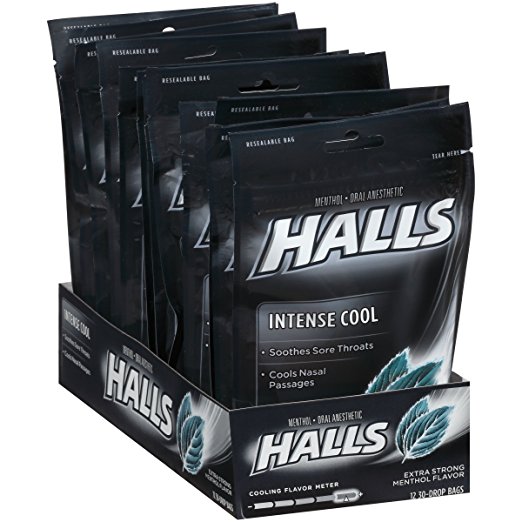
Another thing I always have on hand are cough drops with menthol and eucalyptus, which work to cool and relieve your nasal passages. I find a cough drop with those properties will clear a stuffy nose faster than anything else. And for me a clear nose means less sneezing and nose blowing.
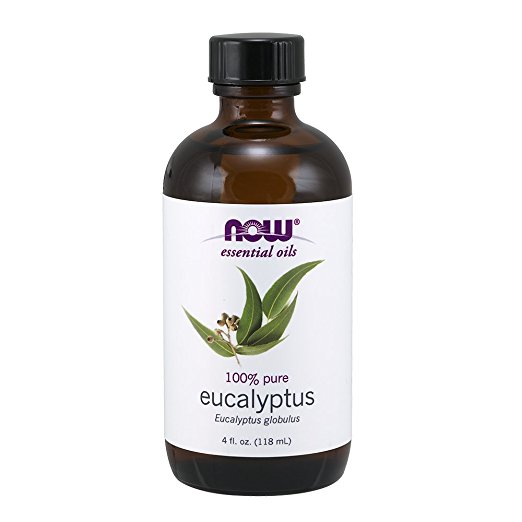
Just like the eucalyptus in cough drops, pure oil can also helps clean your sinuses immediately. Use however you like to use aromatherapy oils – in a bath, diffuser, or just take a sniff of the bottle for immediate relief.
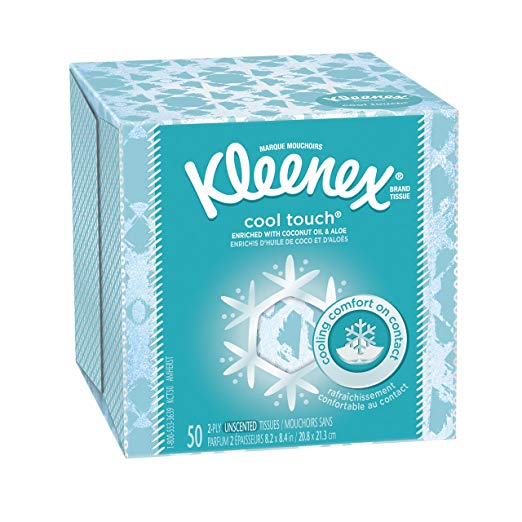
Finally, for the days when you haven’t been able to lesson the symptoms and your nose has taken a beating from all the tissues, I like to use cooling tissues. They have aloe and moisturizers which create an immediate cooling sensation on contact and feel amazing on sore noses. The moisturizers also help prevent a dry nose which is often the result of many nose blows.
Take Control Of Your Allergies & Share Your Results!
So that’s all I’ve got! I won’t make any guarantees, but I’m pretty optimistic that if you try any combination of these solutions you will be able to get your dust mite allergy under control. It worked for me! If I missed anything, please share in the comments below so we can all benefit. 🙂
Over the past 3 or 4 years I’ve slowly been transitioning to a more natural lifestyle. I admit I haven’t completely given up my store bought products, but by switching between them and homemade, I find I keep my skin, hair, and wallet much happier.
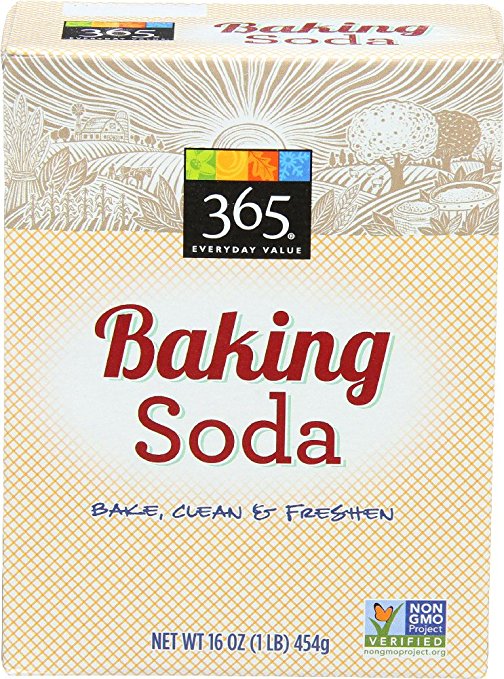
1. Shampoo: Baking Soda
Skip the shampoo with parabens, sulfates, and toxins (your scalp absorbs these!) and instead try a paste of baking soda and water. The combination of baking soda followed by a vinegar rinse (below) is extremely clarifying and for anyone who uses styling products it’s a great way to wash all that crap out. I use about a tablespoon of baking soda in a small bowl, and mix enough water to make a paste that’s spreadable but not so wet that it slides out of your hair. I then pour the paste on top of my wet hair, and massage it into my scalp as much as possible. The baking soda will not lather up, in fact it can get quite stiff in your hair, so I sometimes will splash just enough water into my hair to make it workable again. I don’t worry about getting it down the strands of my hair, as that happens naturally in the hair washing process, particularly when I rinse.
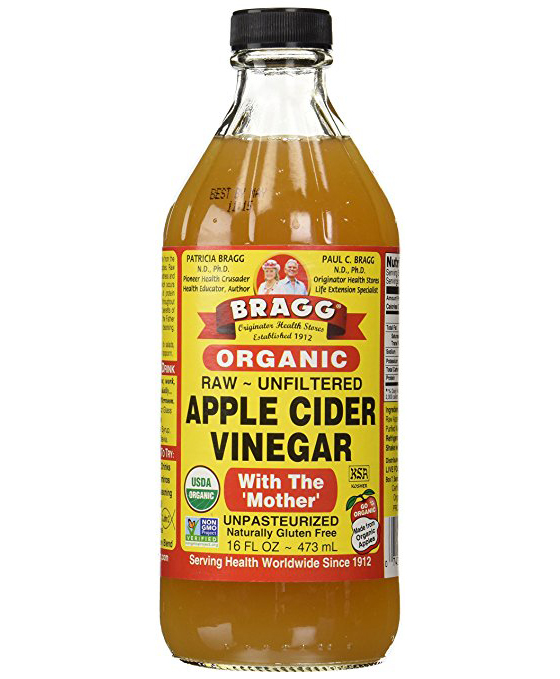
After you’ve washed your hair with the baking soda, you’ll want to followup with a rinse of apple cider vinegar. I usually put about a quarter cup in a measuring cup, and then once in the shower I’ll add water to it so that I don’t get that cold shock of room temperature liquid! 🙂 Pour it slowly over your scalp making sure to get it through all your hair, and then rinse well (really well, you don’t want to smell like a salad). If you like you can add a drop of essential oil to the mixture to help with the scent. Once you’ve done the vinegar rinse your hair will feel like silk!
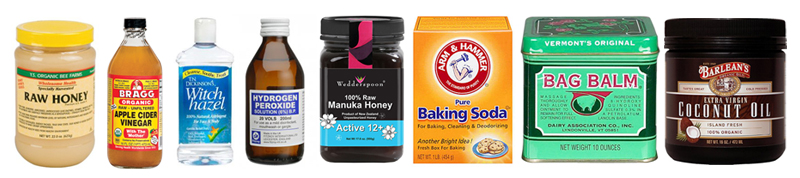
For hair that is dry or has been heat damaged, apply coconut oil overnight. I only use this in the ends of my hair (no more than a teaspoon, but you may need more or less depending on your hair type and length). Once I’ve massaged it through, I tie my hair up in a high bun and sleep on it overnight. When I wash it out the following day, my hair always feel so much softer. If your local grocery store doesn’t carry coconut oil yet, you can always purchase it online, which is what I do. This is the brand I’m using now, but I plan on trying Barlean’s next as I have used their other products with happy results.
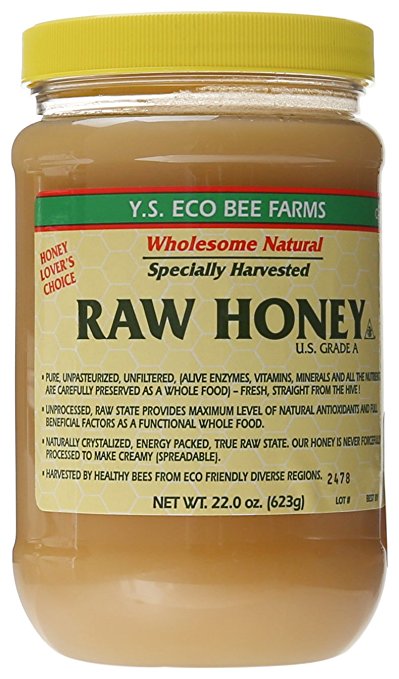
Honey is the best face wash for skin. It’s super gentle and washes off incredibly easy once it comes in contact with water. The antibacterial, antimicrobial, and antiseptic properties of honey make it perfect for anyone with blemishes, as it maintains a clean environment for the skin to heal. Simply apply a small amount of honey to a wet face, and massage your skin well (this also helps clean up skin as it gets the blood flowing to regenerate new cells). The honey will not later up like a typical face wash. Rinse with water as normal and the honey will easily dissolve away. I like to buy my honey locally (from an older couple that sells it out of their mudroom!). It’s raw which is always best, and amazingly is less expensive than the poor interpretations of honey sold at the grocery store. If you can’t find any local raw honey, you may like to try this.
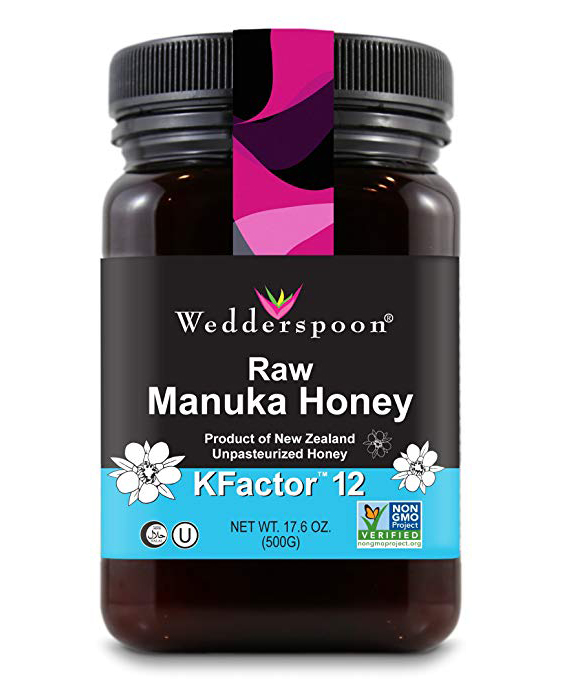
For skin that needs an extra dose of blemish fighting ingredients, manuka honey is the solution. Manuka honey comes the manuka bush in New Zealand, which is responsible for tea tree oil. If you are familiar with tea tree oil, you will know that it is frequently used in products for acne. You will also find that manuka honey has a slight grit to it, which exfoliates the skin. I massage it well into my skin, and then leave it on for around 20 minutes before rinsing off. Honey masks are also moisturizing which is incredible for the winter months. This is the one product on this list of significant expense, but it is well worth it. When purchasing, make sure your Manuka honey is certified. I buy my manuka honey here.
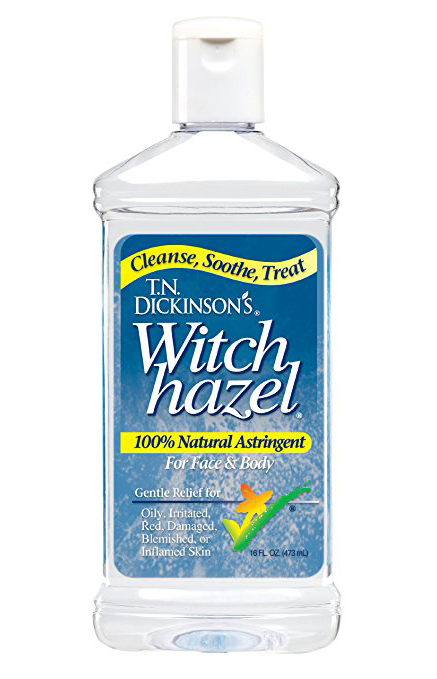
After cleansing, I always like to use an astringent, and for that I use witch hazel. Simply pour into a spray bottle, and give one or two light sprays. My skin always feels off when I skip this step. Some people like to use rose petal witch hazel, but I personally use the plain stuff and it suits me just fine. Note: I’ve linked to Amazon for your convenience, but I can find witch hazel at my local drugstore for a fraction of the price (about $2), so it may be worth it to you to check there first.
Finally, no skin routine is complete without moisturizing. I know there is a whole movement right now involving different oils (particularly argan and jojoba), but I haven’t tried that out yet, as I prefer the more cost efficient and multi-use coconut oil. I warm a very small amount up between my fingers so that it melts, and then I literally pat it into my skin. It’s important not to overdo it, as this can cause blemishes to flare up. Start light and see how your skin reacts to it. Again, I use this brand.
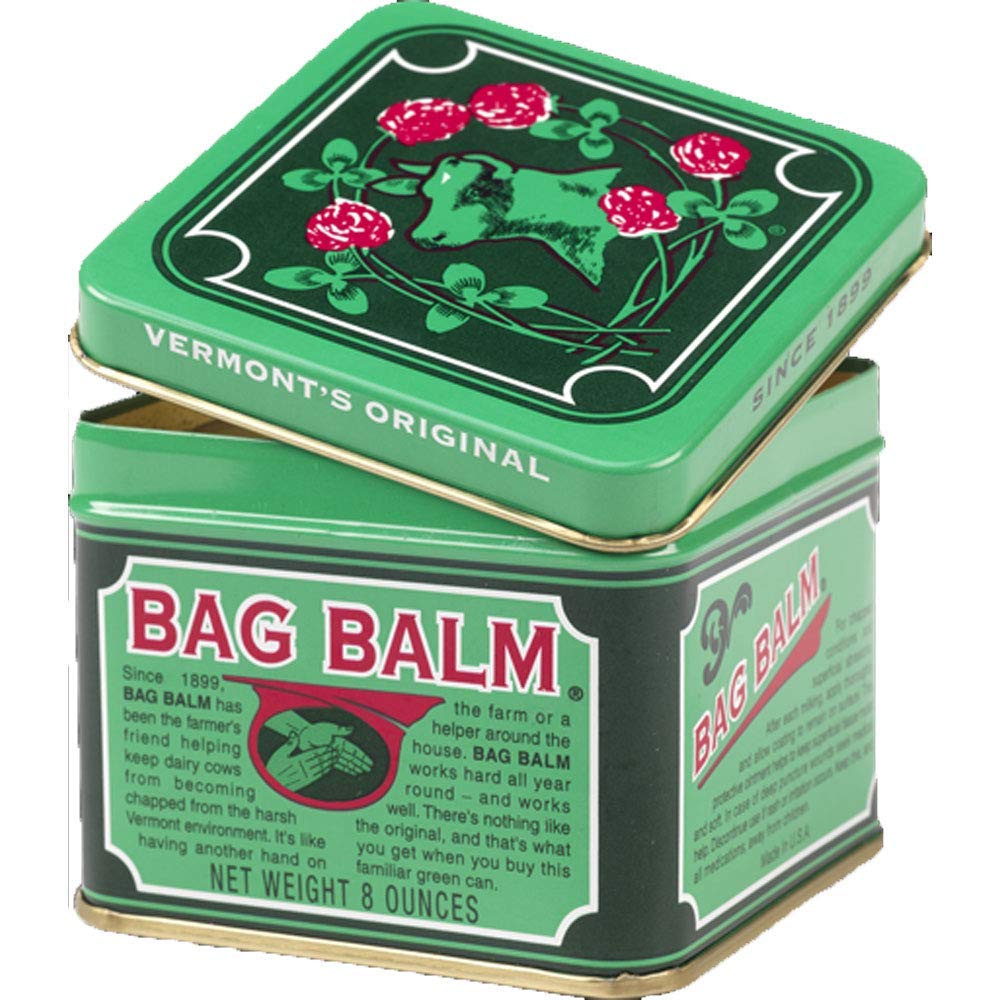
Technically this can still be a one-ingredient recipe by using only bag balm, but I like to add honey for a slight sweet taste, which is more reminiscent of the lip balm you buy at the store. For this I reuse small containers that I’ve saved from other products (samples work best for this), and then I make sure to clean them out well. Honey being antibacterial actually never goes bad, and I’ve read that it’s been found in ancient Egypt dating thousands of years back, and still completely usable! For the recipe: I like to use 3-4 parts bag balm to 1 part honey. Any more honey and it will be too sticky. Mix well so that everything is evenly distributed. You can stick it in the microwave for a few seconds to warm it up and mix easier, if needed. Bag Balm is a Vermont company (my home state!). You can read more about it here if it’s a new product to you. They don’t have an online store, but you can find it on Amazon.
For those who like to wear mascara on the daily, coconut oil is about to become your new best friend. Wipe a small amount into a cotton pad and then hold over your eye for 5 seconds before swiping away. It takes a few wipes but I find it removes all my eye makeup really well. For someone who’s eyes are very sensitive to irritation, making sure there’s no mascara flakes or residue is critical. The best part is, the coconut oil will moisturize your lashes, making them less susceptible to breaking, which means longer lashes! It may take a few weeks to a month to see results, but they will definitely grow if you are consistent with the coconut oil routine.
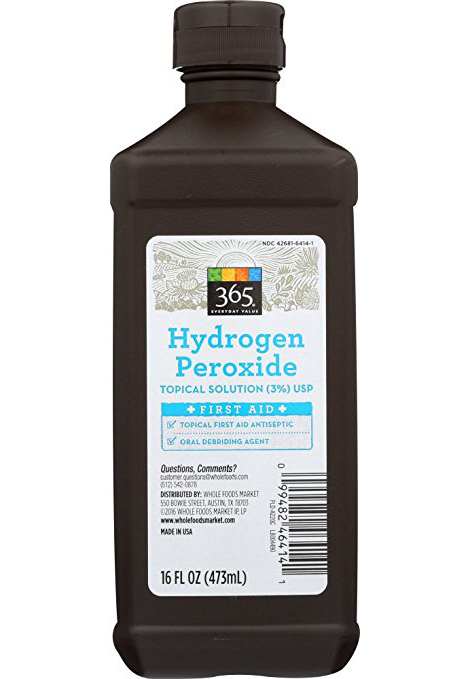
Finish off your bathroom routine with this super easy teeth brightener. Peroxide is in many bleaching products that dentists use, but using the store-bought hydrogen peroxide will save you a lot of money and is also much gentler. Swish a small amount around your teeth for about a minute, and then spit it out. Do this several times a week to brighten and maintain your whites. I don’t do this every day as I find it irritates my gums with daily use.
 In an effort to be more social on the web, a little over a month ago I signed up for a postcard swap with 20 Something Bloggers. I greedily signed up for the max of four swaps, because why not and also because I really like getting regular mail (doesn’t everyone?). After debating for a few weeks over the perfect postcard to send each person, I finally just did a bunch of cards up in watercolor, along with a few extras to send to family. Usually when I paint it tends to be lots of portraits and still-life, so it was fun to change it up a little.